Image examples
[1]:
from easycv.io import show_grid
from easycv import Image, Pipeline
from easycv.transforms import GrayScale, Gradient, Noise, Blur
Loading an image
For this example we will load an image using random().
[2]:
img = Image.random()
img
[2]:
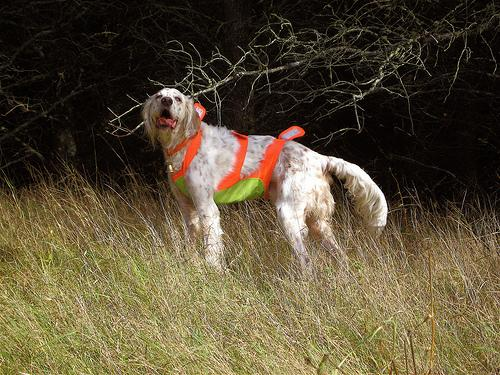
Image Propeties
We can check images properties such as width and height
[3]:
img.height, img.width
[3]:
(375, 500)
Applying transforms/pipelines
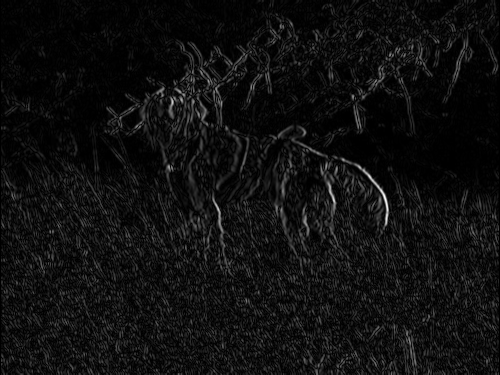
We can apply any transforms to the image
[4]:
img_1 = img.apply(GrayScale())
img_2 = img.apply(Gradient())
show_grid([img_1, img_2])

For convenience, images above are displayed in a grid created using show_grid().
We can also apply pipelines the same way
[5]:
img_3 = img.apply(Pipeline([Gradient(),Blur()]))
img_3
[5]:
Viewing Image
To view the image in a popup window call the show method
[6]:
img.show() # Image window pops up
Lazy images
Lazy images delay computation while possible. To create a lazy image we just specify the lazy parameter
[7]:
img = Image.random()
img.loaded
[7]:
True
Normally transforms/pipelines are executed in the moment. Lazy images will save them for later execution in a pipeline
[8]:
img = img.apply(Gradient())
img.pending
[8]:
Pipeline (pending) with 0 transforms
When any operation requires the updated image it will be loaded/computed. The changes are saved to prevent duplicated computation. You can force the computation with the compute method but calling any parameter/method (width, height, …) that requires the updated image would have the same effect. Check the reference for more information.
[9]:
img.compute()
[9]:

[10]:
img.loaded
[10]:
True
[11]:
img.pending
[11]:
Pipeline (pending) with 0 transforms